Little Something Sunday with Jennifer Longenecker

These little achievement medallions have become all the rage this last year at CHA so I thought I would show you how to make one using cupcake liners and an American Crafts Flair button.


I worked with the American Crafts Campy line, but here are a few others that have buttons:

October Afternoon 5& Dime Tin Pins
October Afternoon Rocket Age Tin Pins


Grab your supplies:
cupcake liners
ribbons
Flair button
adhesive
scrap paper


Step 1: flatten out the three cupcake liners that you want to use as the back of your medallion.


Step 2: Use a circle template and draw a circle on the second set of cupcake liners, then cut along the line. Make sure you keep the scraps, because you will use them in a later step.


Step 3: Take your scrap piece of paper and draw a circle on the reverse side just slightly smaller than the cupcake liners you just cut. Cut the circle out and then draw another circle with-in that circle.


Step 4: Take your scissors and cut slits to the inner circle to create a fringe effect.


Step 5: Glue your flair button to the front of the scrap piece of paper.


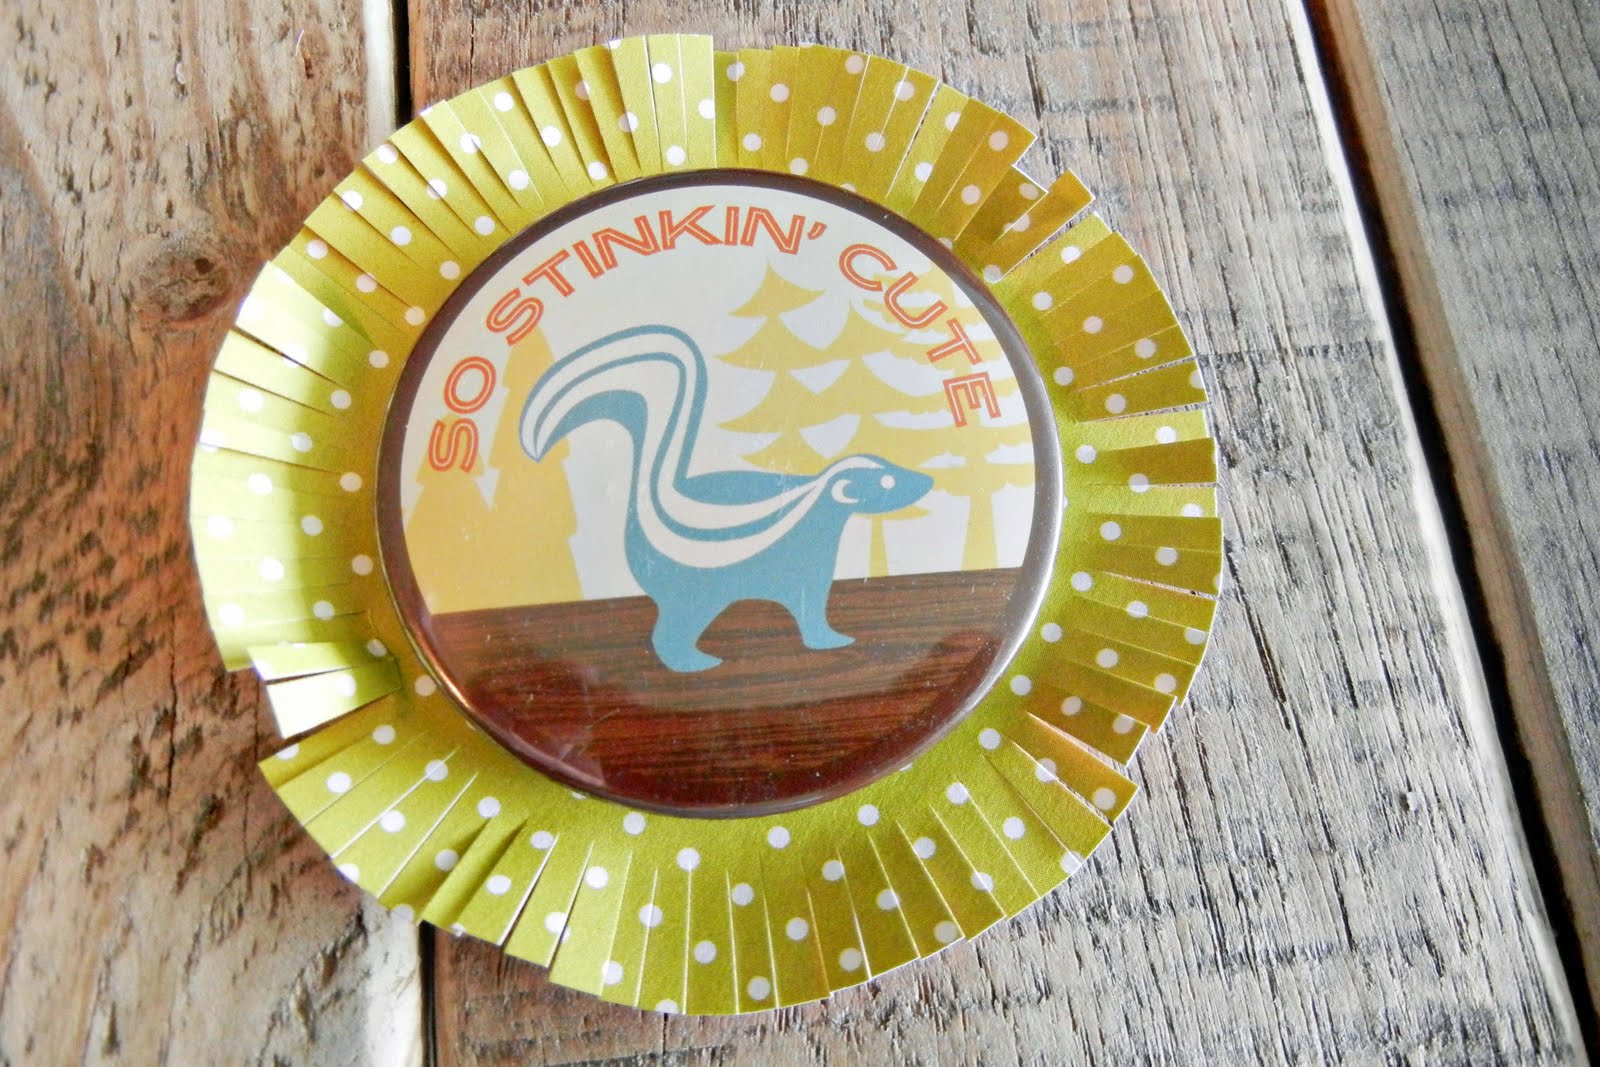
Step 6: Glue the piece you just worked on to the smaller cupcake liners.


Step 7: Glue what you have finished so far to the final set of cupcake liners.


Step 8: Grab your ribbon and the excess from the second set of cupcake liners and staple them together to form a tail.


Step 9: Glue your ribbon tail to your medallion with a hot glue gun and then attach another circle from your scrap paper and attach a metal clip.

New in Store - October Afternoon Rocket Age

Head on over to the A Million Memories store and check out this ultra fun new collection from October Afternoon.

Rocket Age:


May Design Team Challenge

You may have noticed a few changes going on around here. Don't panic we are just working on making AMM even better. One thing we are going to do is move our challenges to the middle of the month. Challenges will be posted on the AMM board on the 15th and will run for 21 days.

This month our host is Marie Ramirez and our sketch designer is Jennifer Longenecker. So here's the sketch ...


... and Marie's twist is to create a LO based on the sketch and using the following color pallet.


You have until the 5th of June to post your LO in the AMM gallery and leave a link to it in the May Challenge thread.

Technique Tuesday with Staci Taylor

Today i'm going to show you how to give chipboard embellishments a face-lift using decorative tape. The tape I used is self-adhesive (by Tim Holtz), but you could use your own adhesive on yours if it doesn't already have some.

You will start out with a chipboard embellishment that you want to cover. Mine is naked, but it could be painted and/or decorated already, too.


I wanted to cover my chipboard in ruffles, so I began at the bottom of thechipboard. I put down a small section and then overlapped the tape upon itself, making a ruffle. As I completed a row, I made the next row above the completed row, making them slightly overlap.


Continue layering your tape until the entire chipboard is covered.


Now, flip your chipboard over, and get out an exacto knife. You are going to trim the tape all around your chipboard so that the pieces do not go past the edge of the chipboard.


Now, flip your chipboard back over, and have fun using your newly resurfaced chipboard on a layout. :-)


Member Monday with Ro Philippsen

Today's LOTW was chosen by Ro Philippsen and she chose this LO by Kathy Morgan.

Here's what Ro had to say: "Kathy's page is full of meaning and emotion, and when I laid eyes on it, it won me over immediately. Kathy also worked with the colors and design harmony, achieving a perfect layout. Congratulations Kathy, your work is beautiful!"


"For the Record" by Kathy Morgan.

Technique Tuesday with Marie Ramirez

This is a perfect project to make with your kids.

Body: 5 (1-inch-wide) strips, 3, 4, 5, 6, and 7 inches long
Head: 2 (1-inch-wide) strips, 2 1/2 and 3 1/2 inches long
Tail: 5 (1 1/2-inch-wide) strips, 2, 3, 4, 5, and 6 inches long
Beak: 1 (1- by 2-inch) strip


Roll the body strips into circles, overlap the ends about 1/4 inch, and secure with a strong glue.


Nest the circles and glue them together.**I used a paper clip while it dried**. Do the same with the head strips, then glue the head to the body.


Curl the tail after gluing them together. Glue the tail to the body.


Fold the beak rectangle in half, then cut off the two folded corners at an angle. Fold in the tabs and glue them to the bird's head.

You could make many of them and hang from a stick. Or make smaller ones to put on your scrapbook pages.

Little Something Sunday with Staci Taylor

Hey there AMM fans. Before we get to Staci's post I wanted to pop on real quick and say sorry about being MIA this last week. I needed a little time away for a week, but now I am back and ready to get this blog rocking again. Thanks for being patient with me.


When most people think of Spring, I think they often think of birds. Although birds can symbolize Spring, they don't have to be saved only to embellish Spring layouts. I'm going to show you several layouts in which I've incorporated birds into my theme.

On this layout, "Stay together", my journaling advises my two oldest to always stay close and lean on each other. I paired up two birds to symbolize not only my son and daughter "staying together", but I chose a larger and smaller bird to symbolize their relationship and mimic the protectiveness that my son has over my daughter.


On my "Beach baby me" layout, I created a little background scene to incorporate the outdoor/beach photo that my layout is centered around. After stitching a sun sticker, the bird was just the final little touch I needed to make me immediately feel the presence of the outdoors that I was going for.


My layout, "This is where it all began" tells the story of where and how I met my husband. I used the two birds facing each other to symbolize "love birds",and I strategically placed them in front of the picture of the row home where we both worked and met.


On my last example, I used the word "birds" in my title. Therefore, I incorporated a couple of birds into the layout to support the title - I used abird photo corner, and I also placed a bird sticker so that it looked like itwas flying towards my sub-title.


Birds are sweet and fun embellishments to use. Hopefully I've shown you that they can be used for many different layouts other than just Spring ones - there are a plethora of ways to use them! :-)