Technique Tuesday With Mia Caniza
Have extra transparencies lying around? Ever wanted to give your transparencies dimension? Or have you ever wanted to replicate those Lollipop flowers but with a funky feel to them? Well, look no further.
Materials:
-Leftover transparencies, preferably thicker ones (I prefer the Hambly ones)
-A heat gun
-3 sizes of circle punches (I used ones that differed by ½” each)
-Tweezers
-Craft mat
-Craft pick
-Brad
-Stickles, optional
-Gesso or white paint, optional
Instructions:
Decide on which transparency designs you would like to use per flower and what order you want them in. Once you have chosen, take your 3 punches and punch out a circle per punch size for each flower you want to make.
Pick up your largest punched circle with your tweezers and heat it up with the heat gun. Don’t mind it if the color changes a bit, you just don’t want it to burn. Apply heat to different parts of the circle making sure to get it pliable so it curls up in some areas. Work with it until you get a curled shaped to your liking. Be careful not to burn yourself. Set aside to cool.

You will want to do the same to the other 2 circles. This time you want to try and work with the transparency so that the way it curves fits into the first circle. Play with it a bit, twisting it until you get it to “fit”. Set it aside to cool. It is also at this point, once it cools, should you wish to paint the back or add glitter to the edges to do so here.
Take your circles and layer them on top of each other making sure they fit into each other. 
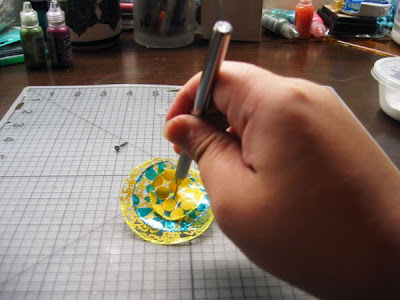
Take your paper piercer and carefully poke a hole through the center of your flower.
In order to insert the brad through the entire flower you will have to do it circle by circle since the transparency has hardened. That way you can also play with it to your liking and arrange it how you want it.
Here you have the finished flower.
Here are 3 different transparency flowers to show you the different options and ideas you can create with this technique.
Thanks so much Mia. I am for sure going to give these a try. And if you use Mia's idea, link us up in the comments here. We would love to see how you use these great hand made embellishments.


2 comments:
awesome tutorial!!! TFS :)
Cute!
Post a Comment