Technique Tuesday with Zoe Nemburt

Hi ladies I hope you all had an amazing weekend probably recovering from eating too much Turkey ;-) I wanted to share today a couple of layouts I made from 2” scraps. I loved the Porcelain Collection from BG when it came out. I had 2 of each paper and have done several layouts with it and even made a paper cake. I kept all the scraps, some were not much more than 3x2inches, so I went through my pile of scraps and cut 2 inch squares and punched circles and butterflies from whatever I could. It’s amazing what you can achieve with just a few scraps. I made this frame first, the frame itself cost around $3 in a clearance stor. I used Kraft paper in the background and added some AMM Vintage Lace, so I went ahead and started to layer pinking circle, circle 2 butterflies and then a pearl I added dimensional foam dots in between the first 2 layers.

So here is the finished product.


So then with the 2 inch squares I had I inked all the edges and created a quilted pattern on my kraft cardstock. I added a little glue behind them, you don’t need much just enough to hold down while stitching. I machine stitch so I stitched the border first in a regular straight stitch and then stitched a zig zag stitch between each quilted square, added some lace and a little stamping and voila!! It’s actually really easy to achieve and looks great when it’s finished.


Member Monday with Karen Grunberg

This weeks Layout of the Week (LOTW) was chosen by Karen Grunberg. She chose the LO below by Regi.

Here's what Karen had to say. "I love the way Regi put her photos inside the window with curtains and everything. This layout has such a wonderfully whimsical look and feel. I also love that she scrapped herself: something I don't do nearly enough."


To see more of Regi's work visit her blog.

Interrupting the Sunday Post for A SALE!!!

In case you missed it, today is the last day to celebrate our weekend sale. You can take 30% off of your entire order using code 303 at checkout.

This is an AMAZING deal, especially considering that US orders ship for $5.00 AND the Hot Bargains section has new product added and everything is 30% - 90% off. In our Christmas Boutique, you can find everything in the store for Christmas for 10% - 60% off.

A few of our previous kits are on sale for an additional 30% off the already reduced price on the June kit and March kit . HURRY and take advantage today!!!

YES, we do accept international orders, so don't think twice. :) Have fun!

Little Something Sunday with Jennifer Longenecker

Today I'm going to show you how to get the most out of your chipboard letters. I find that I run into the same problems when dealing with chipboard letters. Either I don't have the color I want in the font I want or I run out of vowels. There's a simple solution that will give you twice as many letters for your buck.

Grab your letters ...


peel off the top of the chipboard letter ...


and you are left with two chipboard letters the original colored letter and a new raw letter.


I love the natural look of the raw letters. Here are a few LO's I've done using this technique.


AMM Store - What's New Part 2

October Afternoon Camfire


October Afternoon Modern Homemaker


7 Gypsies Conservatory


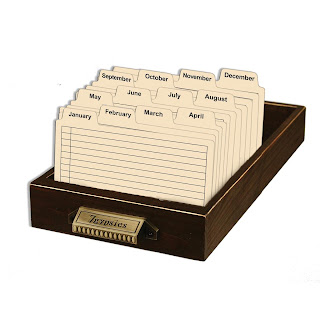
7 Gypsies Library Drawer

AMM Store - What's New

The A Million Memories Christmas Botique is now open!


Every item in our Christmas boutique is 10% - 75% off!!! This even includes the most recent items entered for Melissa Frances, Echo Park and Basic Grey!!! You are sure to find all that you need for all of your crafting needs here!

Happy Thanksgiving!

November Design Team Reveal

Let's check in with the design team to see what they have been up to with the gorgeous November kit.

I just love these LO's by Karen Grunberg. She can do amazing things with punches.


And here are a few LO's by yours truely.


Still more to come ...

November Design Team Challenge Update

It's time to announce a winner, but before we do let's take a look at the challenge one last time. Zoe was the host of this months challenge and her challenge was to create a LO based on this months sketch using something that resembled the "good olde days."

Here's the sketch...

...here are our entries...

"I Did it My Way" by Peggy Schenkels


"Pumpkin Pancakes" by Suzanne


And our winner is ...... Suzanne! Congratulations Suzanne and thank you both for participating in our challenge.

Technique Tuesday with Tonya Dirk

Accordian pleated stars {or snowflakes}:

Step 1) Cut a 12x 1 1/4" piece of paper. To make your star bigger cut a wider strip and if you want it smaller cut a narrower strip.

Step 2) Score strip of paper every 1/4 of an inch.

Step 3) Accordian fold the entire strip and then cut five sections that each have four upper ridges (you'll have a little bit of extra paper that you will not need).

Step 4) Either staple (for larger stars) or glue (for smaller stars) all of the folds together on one end of each of the 5 sections. If you are glueing then you will want to hold the glued ends together with binder clips until dried.


Step 5) Arrange your five sections into the shape of a star and adhere onto the paper or your layout.

Step 6) Cover your center hole with some layered embellishments.

Here's a card that has the snowflake version...just added an extra arm.
and here is a previously seen layout to show an example of the star.

Member Monday with Carole Janson

This weeks LO of the week (LOTW) was choosen by Carole Janson. She chose the LO below by Marie Ramirez.

Here's what Carole had to say: "I loved this layout by Marie the photo is adorable, and I love how she as used all the cute embellishments, the whole layout is very creative, and really nice design."


You can found out more about Marie's by visiting her blog.

Little Something Sunday with Kay Rogers

Variation on a theme.

I was thinking about Christmas, and making cards, wondering how long it would really take to actually MAKE them as opposed to buying them. I decided to do a trial run, and see how long it took to make 6 SIMPLE cards. The answer? An hour. Depending on how many holiday cards you send, I think this is a doable task, even for the time impaired!

To streamline the process, I buy blank, premade cards. That way I know the card fits in the envelope. I cover the front, and viola! I started by cutting out six labels and 6 trees with my Cricut. Punches would work as well. Total time? 8 minutes. I covered the faces with inked patterned papers. I also printed “Merry Christmas” on white cardstock and backed it with red papers.

Here is my first, most basic card:


I then stared thinking about how I could mix it up a bit. So I added a scalloped strip of paper to the second card.


I then turned the card on its side and mixed it up again.


Then I thought of another variation, to round the corners of the card itself, and the papers I used to cover it. I also decided to offset the greeting. Baby steps for linear-sequential little me! LOL!


I also thought it could be interesting to add some fibers and pop up the greeting.


I did it again with a horizontal orientation.


I hope you have been inspired to try making your own holiday cards this year. I think it could be done easily enough if you stick to one simple design. If you get bored, mix it up a bit!

AMM Store - What's New

Looking for some fabulous Christmas lines to meet your scrapbooking needs? Check out these really cute lines from Echo Park.

Echo Park Merry Christmas:


Echo Park Everybody Loves Christmas:

November Design Team Reveal

It's time to check in and see what our designers have been up to this week. Tonya Dirk has been a busy bee working with the beautiful November kit. Check out these fantastic projects:


...still more to come!

November Design Team Challenge Update

It's time to check in once again on our November Design Team Challenge. Remember that Zoe's challenge is to make a LO based on this month's sketch and use something that reminds you of the "Good Olde Days."

Here's this months sketch:


And here's our second entry. This is a recipie page by Suzanne. Suzanne said that the first thing that came to mind when she saw the sketch was stitching the sunburst lines. I love her interpretation of this sketch. Thanks for playing along Suzanne.


This challenge ends on November 21st so you've still got some time left to play.