Technique Tuesday with Stacy Cohen
Pleated Paper Flowers
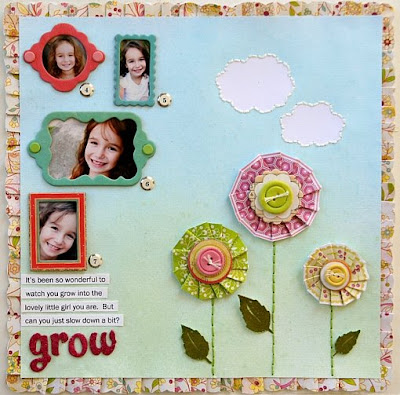
Here are the instructions for making the pleated paper flower embellishments I used on this page:
Materials needed:
1. 12-inch strips of paper (they can be anywhere from a ½ inch to an inch wide)
2. Ruler
3. Adhesive (I like to use Fabritac glue)
4. Chipboard circles
5. Buttons, rhinestones, or whatever else you want to use to top off your flowers.
1. Take a strip of paper. Starting at one end, use the edge of your ruler to make a diagonal fold in the paper.
2. After the first fold, make a fold on the opposite side of the paper so that you have accordion style folds (back and forth, back and forth, as the picture below shows). When you are pleating the paper make all of your folds at an angle so that the pleat forms a circle.
You might need to manipulate the pleats as you go along to get the round shape you want. Keep going until you have a circle and trim any excess paper.
You should end up with something like this:
3. Glue the pleated paper “wheel” to the back of a chipboard circle. I used October Afternoon chipboard embellishments on the flowers I created for the “Grow” layout above. For the example below, I covered a plain chipboard circle with cardstock, sprayed on some Spritz spray, and then I added Stickles around the edge.
4. Top off your flower with a button, rhinestone or other embellishment. Voila!!!
Thanks so much Stacy, can't wait to give this a try.


2 comments:
Thank You, Stacy! This is awesome!
Ca-Uuuuuute!
TFS!
~Robin
www.robinredd.typepad.com
Post a Comment