Scrap Room Inspiration!

Today I wanted to share with you a little scrap space inspiration from design team member, Carole Janson. This room is incredible!
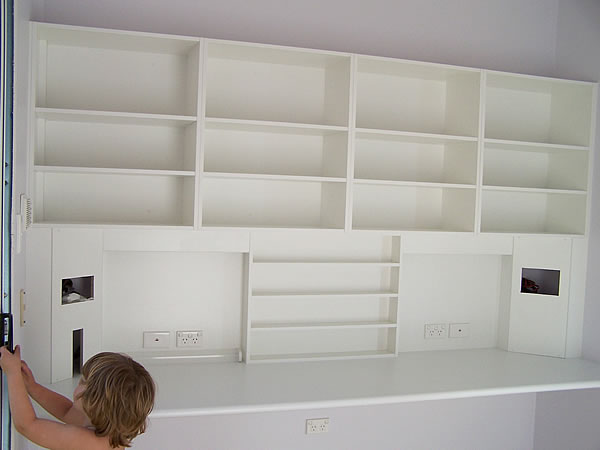

You can see the first photo has nothing in it. This is it finished just before I put all my scrappy goodness in lol !!


Here it is now full lol !! I am still pinching myself. It is finally finished. This is my work station, well that is what Mike calls it. I have everything open because I love to see everything, and I find I work better that way. I have an air conditioner, intercom, phone, TV on either side of the desk, and of course internet yipee, and yes it is all from a Shed. I get 1/4 of this huge shed that now occupies our big backyard. Mike was so wonderful. He has done so much work on this for me.

I had my gorgeous work station and my paper shelves made by a local cabinet maker here in Gladstone and his company name is KBL Installation. Darren has done a wonderful job. I just love it.

My ceiling is really really high in my scraproom, so there is plenty of air and light, just love it. As you can see, plenty of space to put all my boxes and projects.

My desk has two sides to it with the same things such as TV's, power and lighting, and internet. There is also enough room in my scraproom for a small table in the middle if needed.


Now here you can see my wonderful paper shelves. I just love them. They are unreal. I couldn't ask for anything better. Just above the shelves is my peg board, which holds all my products. I love it because I can see everything I own and what I need when making a project.

I love my cake stand it holds all my Bo Bunny Stuck Up tins, such as flowers, buttons and brads, just too cute, and because the tins have a magnetic back, they hold really well onto the cake stand, I also have a shelf/ribbon holder which is amazing and holds all my stamps, paints ribbons and some of my flowers.

Mike also tinted my windows to stop fading etc., of my products and projects. I hope you liked checking out my room. I am loving it lol !!

August Design Team Reveal

Our August Design Team Gallery is in full swing and so I wanted to take a couple minutes today to show you the gorgeousness that our designers have been cranking out using the August kit, "Vintage Potpourri" available here.

First up is this gorgeous layout from Rachel Hall. Love the folded paper quilt she has happening here and all those layers.
"I Am Content"


Next is this white space wonder from Karen Grunberg who was recently asked to design for Tim Holtz!! I adore this textured frame using the trims from the kit.
"The Joy of Living With You"


Coming up is this beauty by Kay Rogers with her first AMM kit! Love how she combined all the patterns across the page.
"Play"


And last but not least is this misted beauty from Tonya Dirk. I adore how she used those Girls Paperie flowers as a scalloped border. So creative!
"Look Alikes"


You can check out more of what the design team has created in the Design Gallery here. Stay tuned for designs from our Guest Designer, Lisa Dickinson!

Technique Tuesday with Tonya Dirk

Did you know the Design Team members put together instructions each month to help inspire you to use your kit. You can always find those kit instructions as well as lots of other free downloads and project instructions in the Freebies forum here. This is just one thing that makes A Million Memories unique from other kit clubs. The Design Team provides lots of free tutorials, classes, and project instructions.

Here is one example of a quick tutorial put together by Design Team Coordinator, Tonya Dirk. She used the July kit, but obviously this can be used with any of your supplies.

1) Start by cutting two strips of paper that are equal in width and length.


2) Ink the edges of the strips and cut one end on each strip to resemble a ribbon.


3) Fold each strip in half.


4) Curl the half of each strip opposite the end you cut to resemble a ribbon. Do this by rubbing a finger along the backside while gently folding the paper over your finger.


5) Fold the curled piece over, without creasing it, and then adhere the end the backside of the loop where they meet.


6) Do the same to both strips and this is what they should look like when you are done.


and the finished product...

Member Monday with Larissa Albernaz

This week's Layout of the Week is brought to you by Larissa who chose this mini album designed by Danni Reid. You can see the rest of the pages of this mini album here.

Larissa said, "I loved this mini album! Flawless construction of layers and layers of beautiful embellishments, positioned with perfection! I loved the colors, the white background, the pictures, the theme poem! And the papers are gorgeous!"


How about learning more about Danni? Read her little interview with Larissa below.
1) Tell us a bit about yourself. What got you started in scrapbooking? I began creating cards 15 years ago when I received a gift from my late grandmother. A gift of scrapping supplies (papers, cardstocks, stamps & markers) so that I could create her cards that I sent instead of buying them. I was hooked ever since. I began scrapping pages of my wee ones (3 boys & 1 girl) since the birth of my eldest (junior in high school now). I love that we share this outlet together, we are preserving not only pictures, but memories, & we all can "gift" the future generation all their memories, their life story in pictures & stories.
2) What three supplies would you not scrap without? cardstock, patterned paper & cardstock stickers.
3) What is your favorite part about scrapbooking? Getting the story behind the pictures preserved.
4) What are your favorite products and manufacturers? I'm on the dt of October Afternoon & Glitz, so they are absolute faves, but I would also include American Crafts & Cosmo Cricket.
Thanks for the inspiration girls!

August Design Team Challenge

Let's have a look at this month's Design Team Challenge! The sketch for this month was created by Zoe Nemburt. Our hostess for this challenge is the lovely Rachel Hall.

So here is the sketch.

What's the twist? You need to scrapbook something funny or an inside joke between you someone else.

And here is Rachel's sample layout.

Journaling reads (taken and had a spin added to it from Stephanie Meyer's Twilight book):
About three things I am absolutely positive.
First, he is a vampire.Second, there is a part of him-and I don't know how dominate that part may be-that thirsts for my blood.
And third, he would mope around like an emo ***** for the rest of eternity.
Oh... and I am unconditionally and irrevocably in love with him. ;-)
Journaling on the tag reads:
I love how you and I find humor and joy in so many of the same things. You have me smiling and laughing more often than not and I am so grateful to share the sillier parts of life with you.Can't wait to see what you create!
So get those layouts uploaded to the gallery and the challenge thread here by midnight on the 21st of August to be entered to win a $10.00 AMM store gift certificate PLUS a selection of AMM vintage trims to be shipped with your order!

August Design Team Inspirations

Hi there and happy August. This summer is just flying by too fast. This month's Design Team Inspiration comes from Wendy Kwok who posted this layout in the gallery. the design team was super inspired and decided to give this one a "lift" Below is Wendy's layout.
"Solitude" By Wend Kwok


First up, Karen said, "I loved so much about this layout. I loved the white background, the layering beneath the photo but most of all the placement of all the elements on the page. Those are what spoke to me the most, so those are what I tried to emulate."
"Focusing Hard" by Karen Grunberg


Next Carole said, "Wendy Kwok's layout is simply stunning, I love the arty feel to this layout and even though it does have plenty of embellishing and misting etc., I also love how Wendy has utilised all the space on her layout."
"Treasured Memories" by Carole Janson


Last but not least, Tonya said, "As you can see I was inspired by...the whole thing! The mini banner, the mist, the little photo, the placement of it all!"
"Captain" by Tonya Dirk


Thanks for the inspiration girls! Be sure to keep uploading those projects tot he gallery and you might be the next person the design team lifts!

Design Team Challenge Updates

I am a little delayed in announcing this, but our winner from last month's design team challenge was rebeccak for her layout pictured below. Rebecca has won a $10.00 AMM store gift certificate along with a selection of AMM vintage trims!

Congrats Rebecca!

"My Mom"

Tune in tomorrow for details on the August Design Team Challenge.

Technique Tuesday with Zoe Nemburt

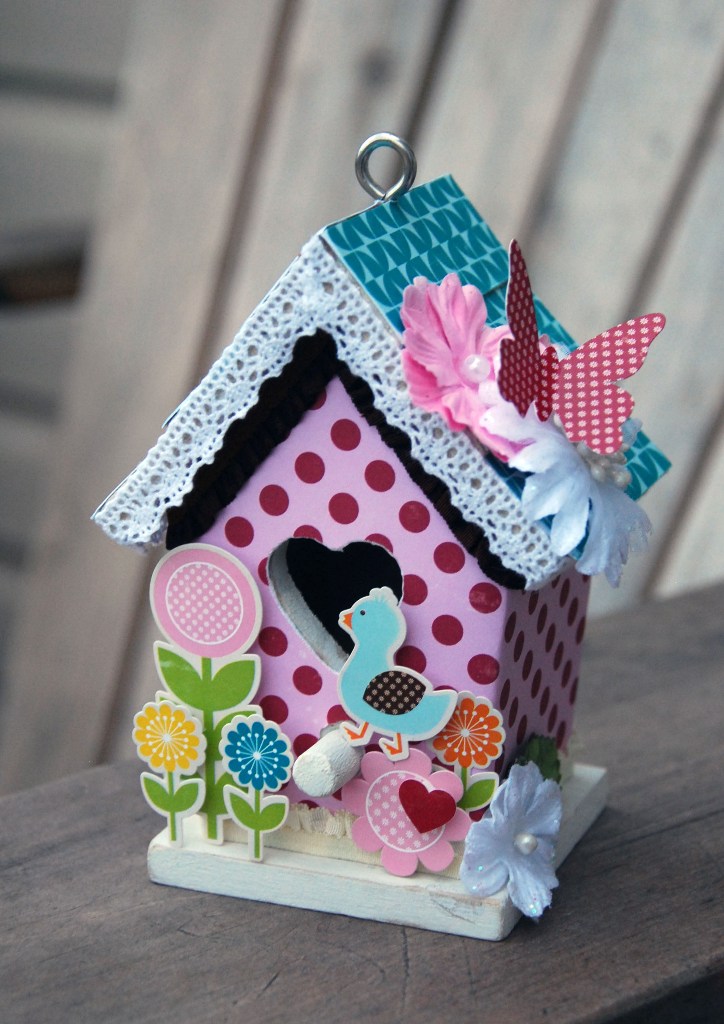
Hi ladies! thanks for visiting, today I would like to show you how I altered a small wooden birdhouse using Echo Park's new gorgeous paper collection "Walk in the Park" available in the A Million Memories Store here.


I found these super cute wooden birdhouses from the dollar store!! I purchased 3 and have already decorated 2, I love the whimsical look they give scattered around the house.

I started by painting the areas I wouldn't add paper of trim too, I wouldn't worry about making a mess the rest you will cover over any way.

This is the tricky part, I measured from the bottom to top of the birdhouse and cut a strip of that width, then I punched a small hole in the center the same height as the perch and pushed it over the perch onto the house, The I pressed the paper into the corners and used precision scissors to trim off the excess, You could do the same with a precision knife. Glue as you go around the edges, smoothing the paper flat as you go. If you want to finish the back of neatly you can with the same method only cut the paper to the exact size to fit and don't wrap the paper towards the front.

Next take a file and file down the paper at the edges, this birdhouse featured a little heart.

The roof was simple I cut a strips of paper about 1/2 inch wide and glued with fabritac and trimmed off the edges. I then sanded the edges to give a subtle distressed feel.

Time to get busy with trims, super easy just a fine bead of glue around the edges and adhere the ribbons and trims as you go.

After embellishing here is what the birdhouse can look like finished. Thanks so much for stopping by today, I hope I have inspired you to create today.

Member Monday with Jennifer Longenecker

This week's Layout of the Week was chosen by Jennifer Longenecker. She chose the layout below by Jennifer Decena Jesse, also known as "jenifa247" on the message boards.

Design Team member Jennifer said, "I just love this monochromatic LO by jenifa247. The paper strips and circles add so much texture, but what is really striking is the subject of the LO. 'We'll always be sisters, there for each other, and BFF's No Matter What.' Thanks for sharing this very touching LO with us!"

"No Matter What"


Be sure to leave Jennifer some love on this post and stop by her blog here.